There are better sites for mold making than this one, so rather than go into detail, I will just provide a few links.
I used liquid latex over a skull I bought from a Disneyland magic shop about forty years ago. I tried initially to use Great Stuff as my hard shell to keep the latex in place but that did not work very well. So, I remade the latex mold and this time used plaster and cotton gauss for the hard shell but still used Great Stuff to fill in the rest of the box.
Working with two-part polyurethane foam takes practice. The key is in the mixing. I used a bend coat hanger stuck in my power drill and mixed the components in a clear plastic cup. By the way, make very sure you don't have any sharp edges on your mixing blade if you do this. I always tested out the mixer in the cup before I poured anything in it and more than once did the coat hanger rip right through the cup. The key was to bend the coat hanger so that the blade width was about half the width of the battom of the cup and the end of the wire was protected near the center shaft. Anyway, if you mix too long, you don't get the fine details of the mold. If you mix too little, you get a sticky, toxic skull with large gaping holes in it. So, if it is you first time, buy extra foam.
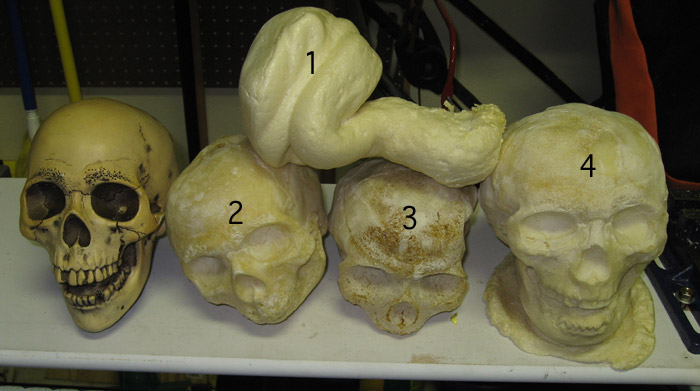
The 6 lbs foam worked for me. Fortunately, I was able to use many of my "failed" skulls in this project. They didn't look good as a stand alone, but as a group, they looked fine. And, the small variation in size and shape actually worked to my advantage here. I used a Dremel to carve out the nose, jaw and teeth. I kept the jaws attached. I then used a hacksaw and cut off the back half of the skull. I placed the foam skull flat on a board and carefully used a 1.25" bore to drill out the eye sockets. I tried to keep the bore as level as I could as I did this (my power drill has a level on it). I then flipped the skull over and used a 1.75" bore to widen the back of the holes I just bored. This is to minimize friction with the 1" spikes as they slide through.
Recently, I have not been able to get 6 lbs foam. New Federal regulations made it more difficult to get ahold of, but 3 lbs foam is still available. That should still work fine for a project like this.
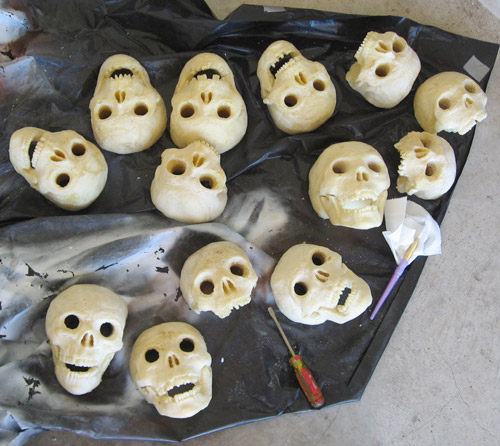
It was soon obvious that I was going to have a problem. The carved foam was grainy and hard grains of foam would rain down when I tapped an upside down skull. This was not good as I wanted everyone to be looking up at them and it was not my intention to be pouring sand in their eyes. So, I beat the skulls senseless to knock out as much of the loose foam as I could and then coated them with three coats of Elmer's Glue. This gave the skulls a hard finish and sealed in any loose foam grains. Some white spray paint and they were ready to mount.