So, making an elevator simulator is a bit involved, but isn't as difficult as you might think at first. Basically, you make a small room supported by springs and you shake it. The key to its success is what kind of things you can convince the kids are happening outside the room. The first time I did this, some of the younger kids actually believed that the elevator was real. Anyway, if you add sounds and gadgets to the elevator, the ride is interesting, scary and fun.
There are several pieces to the 2008 elevator and not all are "must haves". I have broken them down into separate pages for simplicity. For this page, I will attack the general strategy.
I personally think that the entrance to the elevator is just as important as the elevator itself, maybe even more so. You need to "convince" the kids that they traveled somewhere. Some haunters like to have front doors to enter the elevator and a separate pair of back doors to exit. That way, you don't have to move anything and the exit room/scene is always ready to go. Some real elevators do have front and back doors, but not many. To me, that is too obvious a way to get around the fact that your elevator does not actually travel. I think it screams to your audience "THIS IS FAKE!". I rather take the slightly more challenging path of keeping the entrance/exit door the same and completely change the look of the entrance room to the elevator from when they go in to when they come out. This includes changing the ceiling and floor. Here is how.

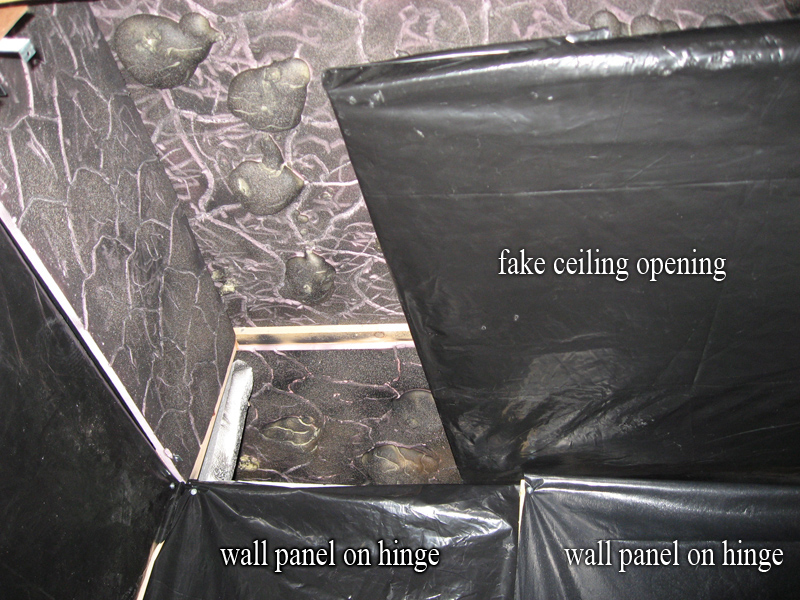
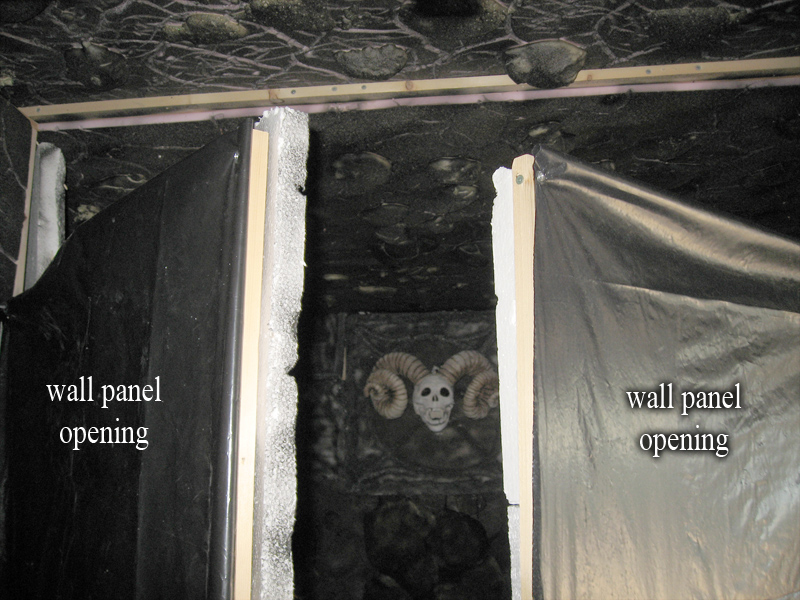
You will need to make a few walls on hinges. The floor panel just in front of the elevator will be on a hinge as well. Make the walls double sided. One side looks like your first-floor entrance (mine was simple black plastic). The other side is stone hell wall. You also have a stone ceiling, which is covered by a movable ceiling panel. After loading the kids into the elevator and closing the doors, I will slide the false ceiling panel out of view, flip up the hinged floor panel (reveling the floor of hell) and rotate the two wall panels. Now, the floor and ceiling has changed, the original floor is hidden behind one of the wall panels and the entry steps are hidden by the other wall panel. You now have a completely different room in about 10 seconds time. It was difficult to get good pictures, but here are a few.


Pictures do not do the scene justice. Things looked a lot creepier with the proper red lighting.
There is a better way to do the change. Maybe I will do that in 2012.
The elevator this year was essentially a box in a frame. The frame had a floor with spring supports, one side with scrapers for sound effects and another side that supported the rotating stone panels. I've got really bad pictures of this, so bare with me.
The bottom of the frame could have been designed better, but I just threw together what I had on hand. I first made four "pin" supports to hold the elevator in place, but let it move up and down slightly. I simply cut some 3/4" threaded rod into 6" lengths (a hacksaw will do it with a little effort) and bored a 1" hole through some 2 by 4s as shown below. I used the appropriate washers and hex nuts to hold the rod in place. Basically, I repeated what I did in the 2006 elevator. Those pictures are better of the frame.
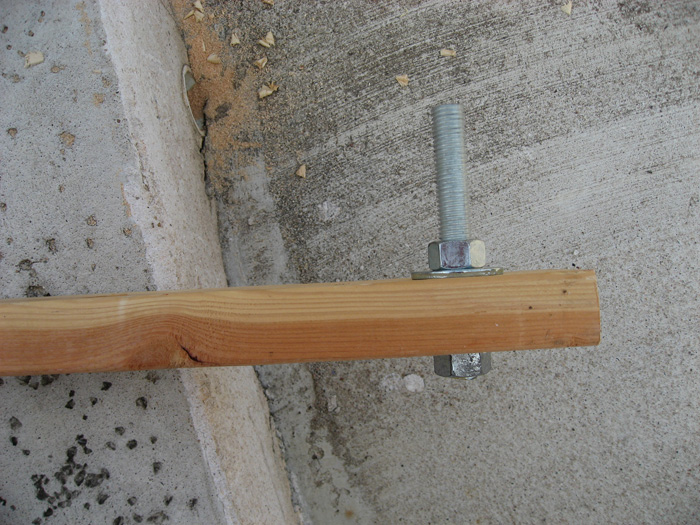
That nut sticking out the bottom end won't do as a support so I drilled a 1 1/2" hole in a second 2 x 4 and screwed the two wood pieces together so that the bottom nut fit in the hole (shown below). I made four of these and made them into two squares. Then I attached the two squares with a crossbar. Then, I put in some smaller crossbars to keep everything from falling apart. Again, it could have been better built but it worked. There is a picture below but part of the bottom frame is obscured the the bottom support of the elevator floor. I will show some other pictures later but you can see better pictures of the approach in my 2006 elevator description.
So, the bottom support of the elevator floor was was made from four pieces of 5 1/2" by 1 1/2" lumber. I made a rectangle that was 8" long and 4" wide. I drilled four 1 1/4" holes at the corners to slip over the four pins of the bottom frame. The picture is below.
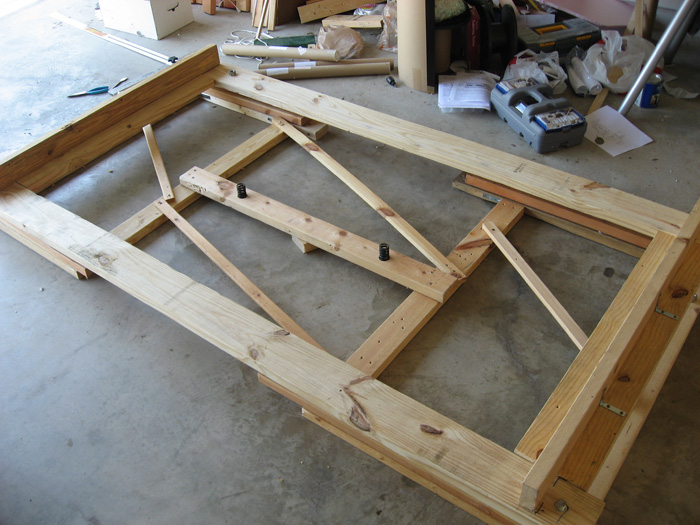
And here is a side view showing the pin (with a small section of PVC pipe over it to keep the threads from biting into the wood) and a spring.

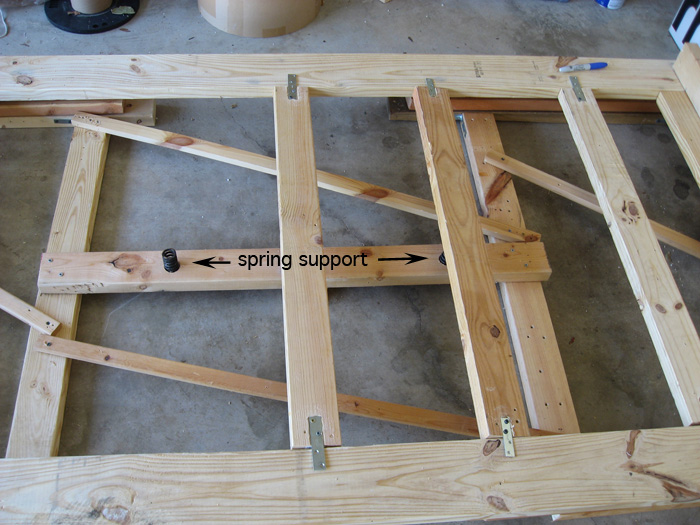
I then put on a few crossbars to support the floor (which will be a 4'x7' sheet of peg board). I used my Dremel to route out a shallow trench so that the metal braces will lay flush with the top of the wood supports.

I put a total of five crossbars on the base about 1.25 feet apart. Two of these crossbars were supported in the center by springs. Only three crossbars are shown in the picture. The other two will go on the left.
To complete the floor, I stretched a thin bed sheet down over the base then screwed down a 4'x7' sheet of peg board. Why peg board? Because I am going to put a speaker under the floor and I want the sound to fill the elevator room from below without being muffled. Sorry, no more pictures.