This guy was not a small project and I am pretty proud of him. I borrowed heavily from other people so I can claim only as much credit as one can from borrowing ideas from multiple sources and combining them (with modifications) into something somewhat new. I loved Devil's Chariot's Cauldron Creep and basically used his approach. I wanted my creep, however, to talk. I also needed a little more control over his body movements. So, I did three things. First, I needed to replace the simple skull with a 3-axis talking skull (which I would make from scratch). Secondly, since my skull would be heavier, I needed a stronger body frame. Lastly, I replaced the crank motor in DC's creep with a servo so that he would raise and lower his body to a script rather than do just a repetitive rocking motion.
Sorry, I am not going to go into detail on making a 3-axis talking skull. That would be a lengthy and repetitive exercise as it has been discussed in great detail elsewhere. I used a Lindberg Pirate Skull and followed this blog to create my prop. I followed closely as I could and made modifications for some of the machined parts. If you have never made a 3-axis skull before, start 9 months in advance. You will have challenges. Also, make sure you read through the whole blog before you start. He makes changes mid stream.
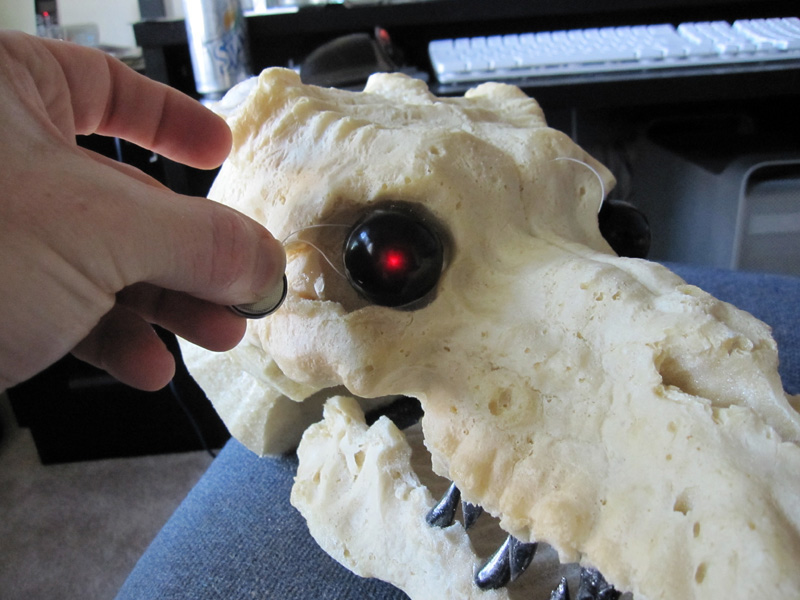
So, assuming you have the 3-axis talking skull now (man, you where gone a long time), let's start with the eyes. I could have spend even more time to make a 3-axis skull with eyes that move, but I decided that it would be much simpler and actually better to take a different approach. If my skull had moving eyes, then he could look at only one (more likely zero) kid at a time. I wanted him to always be looking at all kids at once. DC's creep had glowing balls for eyes, but this to me makes him look blind. I decided to try a translucent black ball with a point of red light in the very center of the sphere. If I centered to light correctly, he would theoretically always appear to be looking at you no matter what the angle. That effect didn't work out as well as I would have liked but I do like the way the eyes turned out anyway.
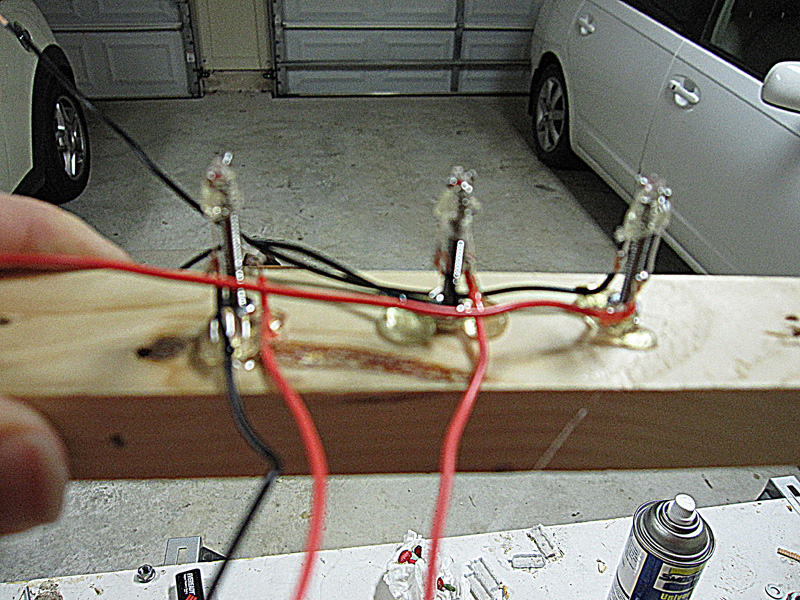
To make the eyes, I used 1" glass Christmas balls as a mold. I used Clear Cast casting resin with a small amount of black pigment mixed in. In order to get the red LED (I got about a hundred of these bright, 1mm red LEDs from Electronic Gold Mine) I created a wooden clamp support that would hold the Christmas orniment and a peice of 4/40 threaded rod in place. I made a support out of woodend blocks and wood screws, then used a drill press to drill all the way through the top block and partially through the bottom block as shown below,
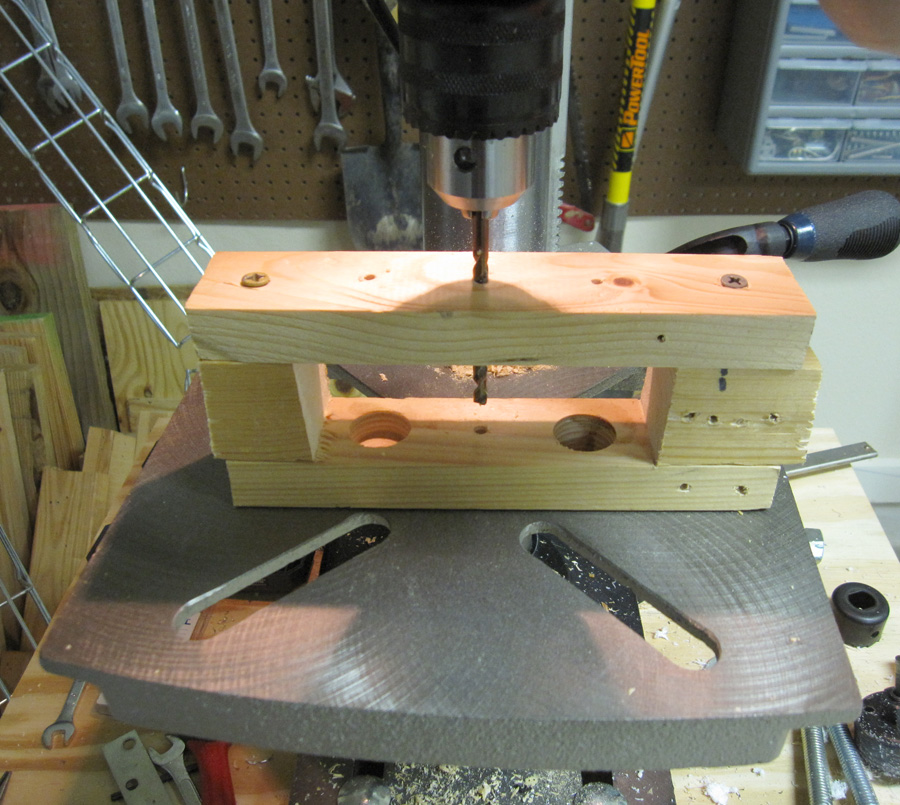
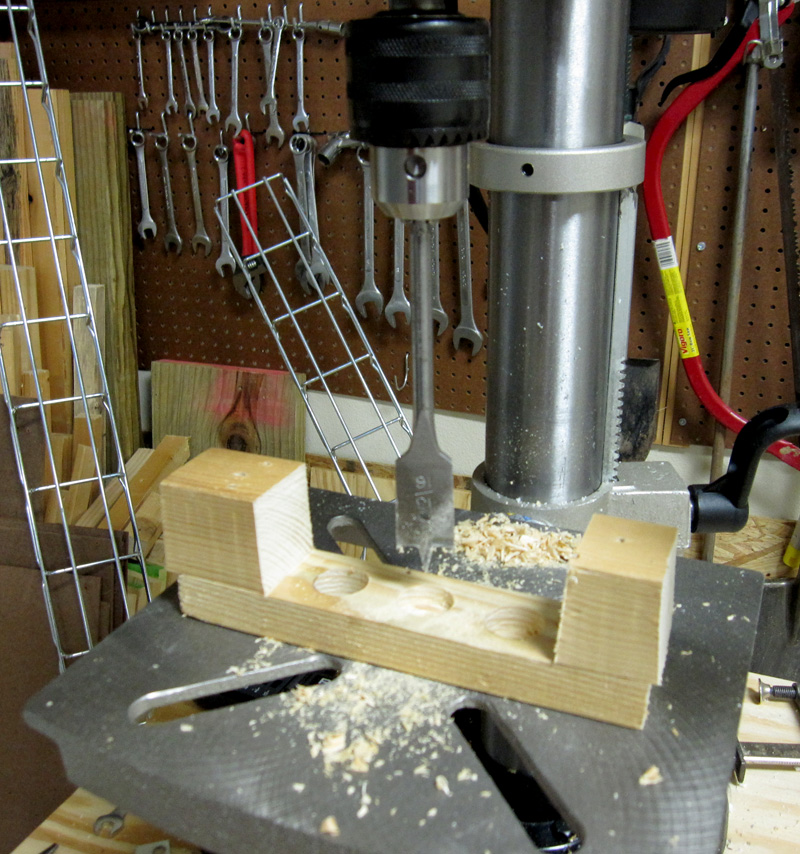
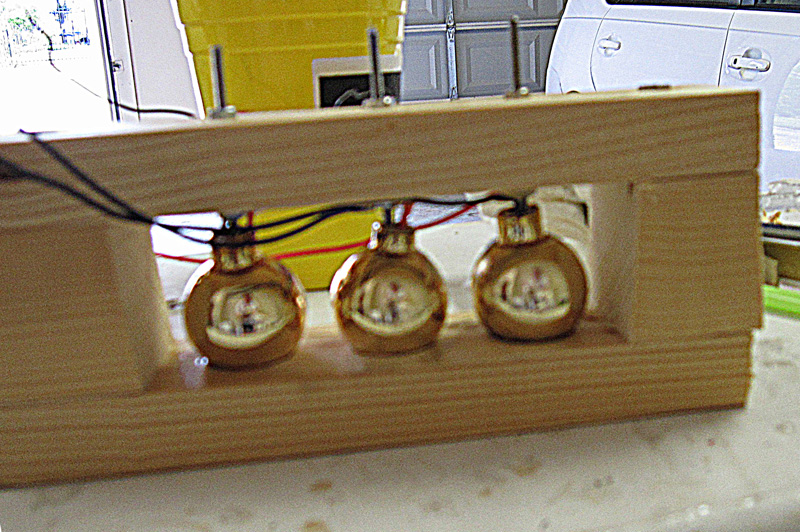
I then removed the top block and replaced the drill bit with a 3/4" bore and used the hole in the bottom block as a guide for the bore. I did not bore all the way through, just far enough down that it will support the 1" ball. I made three depressions.
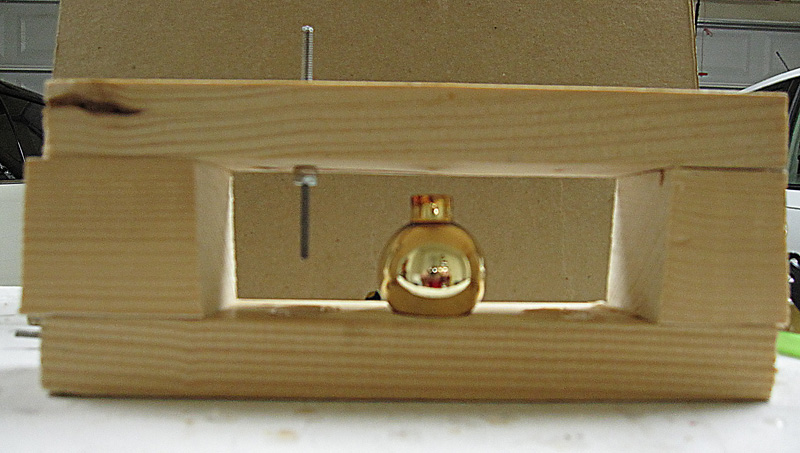
I then reassembled so it looked like the image below. I adjustedThe depth of the 4/40 rod so that it was even with the center of the ball and used hot glue to glue the LED (with wires) tothe tip of the rod (sorry for the un-focused pictures). I then filled each ornament with the pigmented resin and put everything together.
After a few days, the resin had hardened and I could break open the Christmas balls. The final eye looked like this:
THIS PAGE IS UNDER CONSTRUCTION