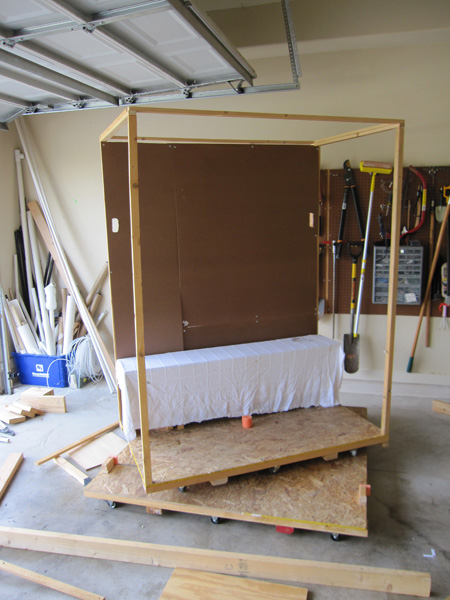
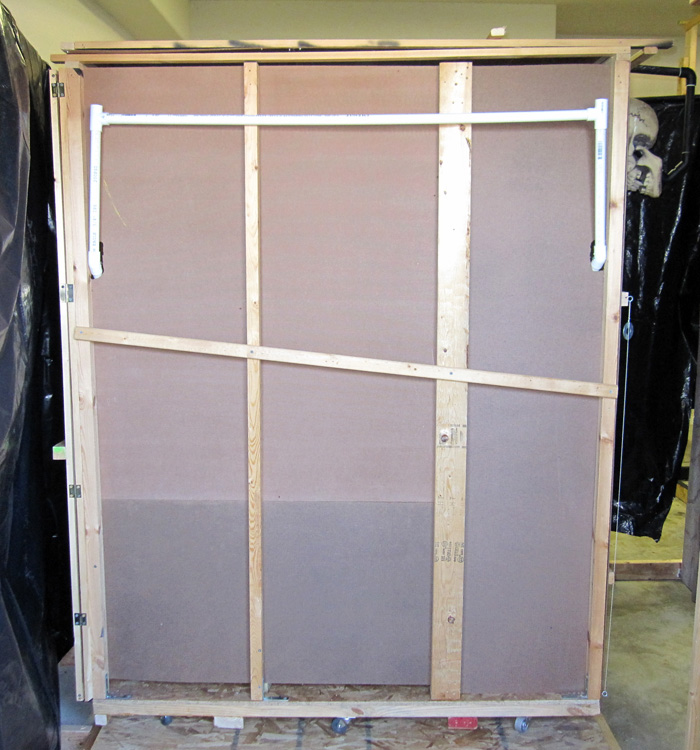
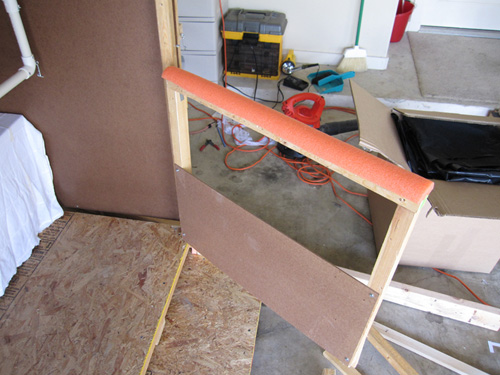
This page is under construction.....Now that we have a base, it is time to make the walls. The walls were 6' tall and every wall ended up with some movable element. The three walls and ceiling were made of hardboard from Home Depot. I started by making a frame with 2 by 2s and moved forward from there. I used heavy braces to attach the frame to the platform.
Yes, that is a piece of pool noodle over the pivot. I will get to that later.
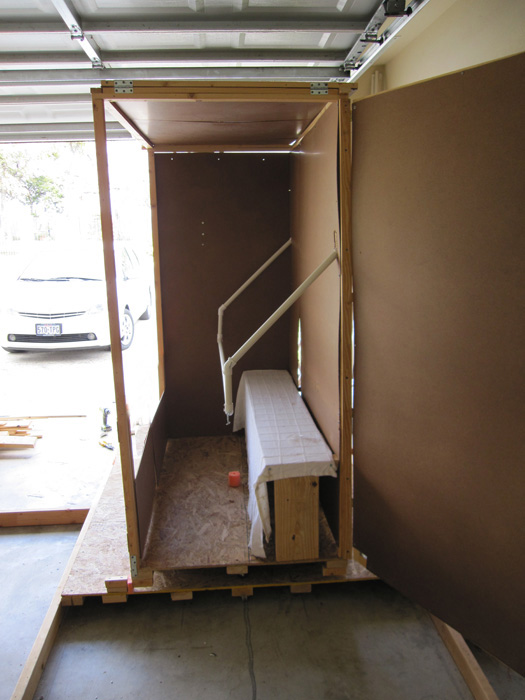
I made a door composed of from a light wooden frame and hardboard. I then hung it with three hinges and added a heavier wooden bar about one third the way up. This bar is what I was pushing on to slide the bench to the next corredor. I did the same with the ceiling and attached it only with hinges on the right side as well. This is so the "giant skeleton" could "rip the roof off". The wall opposite of the door was attached without hinges as was the back wall.
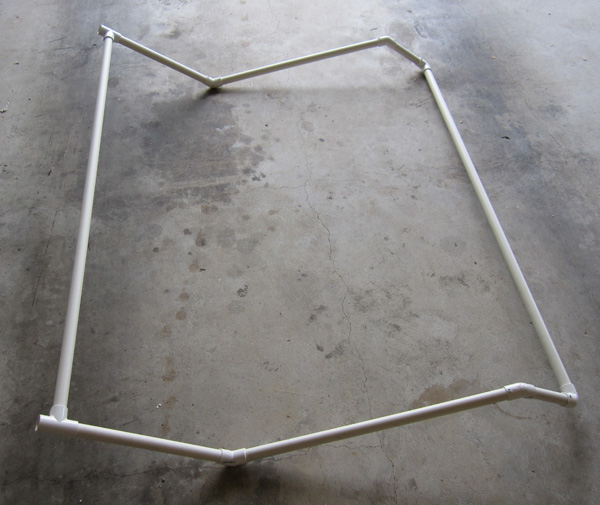
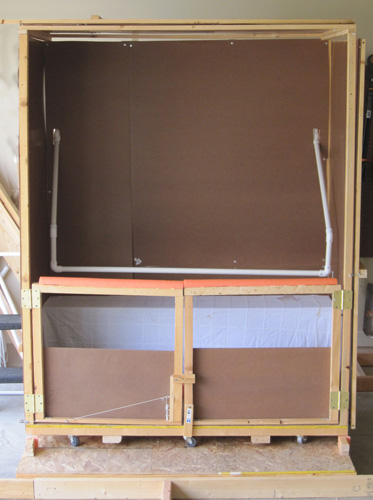
As you can see in the picture, I cut two holes in the back wall. These holes are for the lap bar. I made the lap bar from 1" PVC pipe using both 90 degree and 45 degree connectors. The T-connectors you see can be substituted with 90 degree connectors. Since the bench is 5' wide, I made the lap bar 4' 9" long. The bar not attached to the T-connectors below is the bar that will rest in the kids' laps. This shape seemed to work best in the confines of a 5' x 3' x 6' box.
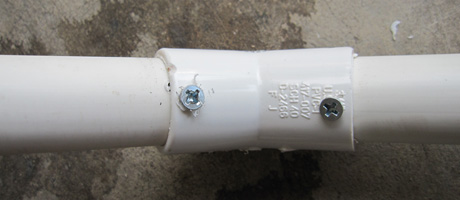
One thing I learned is that no matter how secure this structure may seem, it will still come apart unless you screw the pipes into the connectors. Fortunately, this is easy to do (it took me 5 minutes on Halloween in the middle of my haunting). Use #6 screws wood screws. They are sharp and don't need tapping.
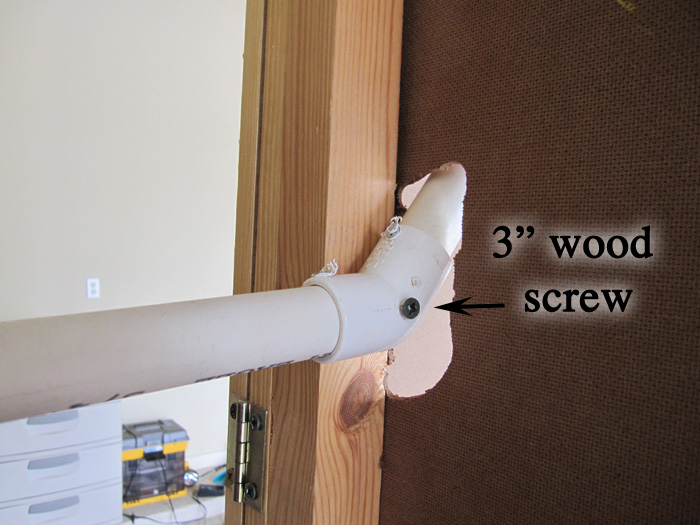
I secured the lap bar to the bench frame using a single 3" wood screw (at the 45 degree connector) at each end. This worked fine for a pivot. Just to make sure you noticed, the lap bar is being attached to the INSIDE of the frame. That is why I had to cut the holes in the back wall.
When the lap bar is down, the back of the bar lies flat against the back pannel. You can lift the lap bar simply by pulling the back handle down.
I did not create any sort of locking device to keep the bar down. No one tried to lift it back up during the ride. If you want to lock it down, it would have been easy to install another hook at the back of the lap bar setup for that purpose.
So, the bench now looks like this...
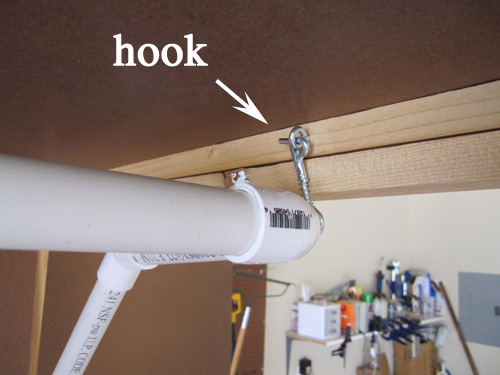
You may notice the small hook dangling from one end of the lap bar. That is to keep the bar up as you are loading the kids.
One issue I had (as you can see in the video), was that my pivot was about 2 inches two tall and stuck up in the walkway. Originally, I was going to put that pivot point just under the bench so that it would not be an issue. However, that would leave only 18 inches for a walkway and I did not have the room in my setup to make the platforms any larger. I attempted to cut it down with my dremel but that didn’t work. I didn’t want people stubbing their toes on it so I thought I would just cover it with PVC pipe and extend it all the way to the ceiling. People could easily walk around it. The problem was that it was in the way of people sitting on the bench. I was going to use a section of 1” PVC pipe anyway to use as a make-shift bearing so I cut a small piece of a pool noodle and glued it to one end of the PVC pipe section so that it acted like a cushion if anyone kicked it. I then lightly frosted the inside of one half of one of those plastic make-it-yourself Christmas ornaments with white spray paint put a battery-operated LED on the top of the noodle then glued down the half dome. Whala! I turned a trip hazard into an interior dome light. It worked fine for about 2 hours until some woman step right on it and smashed the dome into little pieces. You can always count on someone to do something like that. Well, at least she didn’t break the LED and we got through the entire night without any further incidents but there was a slight risk here tht I don't recommend.
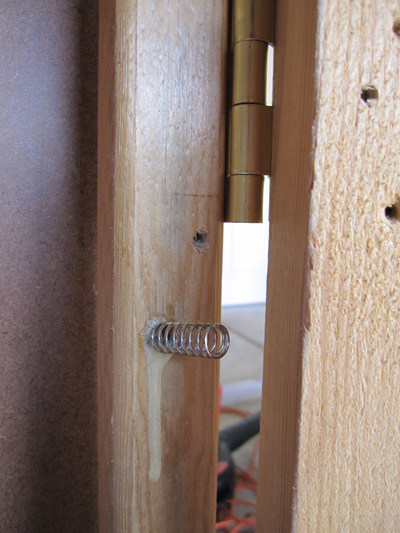
The front of the bench box had small swinging doors about 24" high. I wanted the front of the bench box to open up by itself when we were ready to unload the kids into the corridor. I did this with some small compression springs I bought at Home Depot. I simply drilled a shallow hole into the box frame with a large drill bit and glued one end of the spring into the hole with some Gorilla Glue. One thing I quickly noticed is that the spring worked best if it was angled slightly towards the opened door. This helped with the initial contact of the spring with the door frame. You will notice that I used heavy hinges and thick wood to make this railing. I wanted to make it sturdy in case anyone decided to lean on it when they were getting into or out of the box. I also glued pool noodles (cut in half lengthwise) to the top of the railing. This was to prevent splinters.
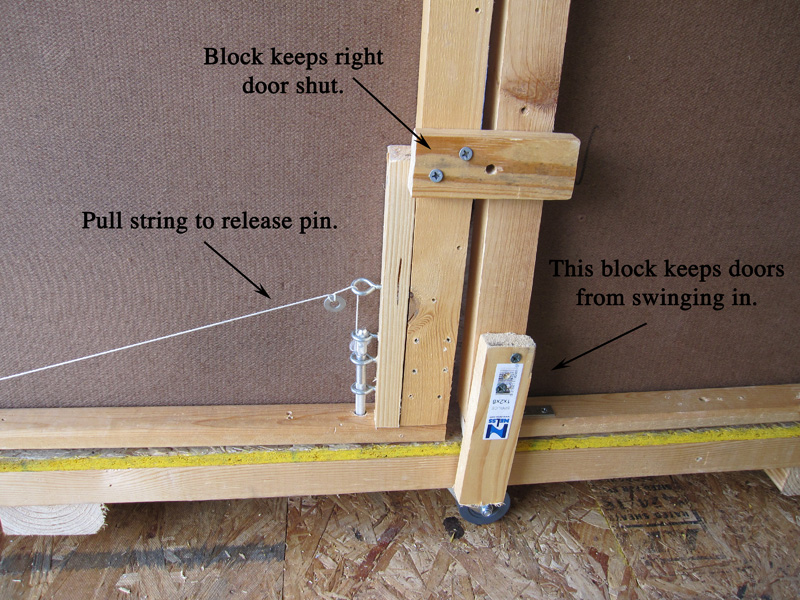
Now that the doors where spring-loaded, I needed a mechanism to release the doors on command. This was pretty easy to do. I just used a metal pin (actually, it was an Xacto knife with the blade removed) attached to a spring. I drilled a hole in the rotating platform and used some eyebolts to hold it in place. I then ran the string along the base of the one door and out to the back of the bench box. Now the door would spring open by simply tugging on a string. Since there are two doors that swing open from the center, I used a small wooden block attached to the pinned door to keep the unpinned door closed. I also attached another wooden block to the bottom of the unpinned door to keep it from swinging in towards the kids if they grabbed it while loading. All of this is on the outside of the doors, not visible to the kids inside.
Only one more thing and the bench is done....