I have a love/hate relationship with stone walls. Mine are not as good as some, but better than others. They look great so I love to use them (black plastic is just so boring!) but they add time and expense to my haunt and the don't store as well as black plastic. Anyway, I made two types of stone wall. The first is a natural stone wall that I described in my elevator simulator how to so I won't repeat myself (just make them bigger and don't cut the panels). The second are large black bricks. The black bricks are very easy, if you can find large blocks of styrofoam. I got mine out of the dumpster at work. You can buy styrofoam but it is amazingly expensive when you calculate the square footage needed. One other thing about styrofoam, it puts out toxic smoke when burning. You have to been very cautious of fire hazards if you are going to do something like this.
So, grab a block of styrofoam and a small saw. Shave the edges with the saw. Gouge a few cracks in it. Spray paint it black. Repeat three hundred times.

Here is a wall I created using the blocks. I made the wall frame with two-by-fours and used long wood screws to attach the blocks. Note that I put the screw THROUGH THE STYROFOAM AND INTO THE WOOD. I did not drill the screw through the back of the wood so that the screw stuck out a few inches then push the block into the sharp screw point. That second method works just fine. But what happens when that obnoxious kid pushes his friend into that styrofoam fall and he crashes through it? Are there sharp metal screws waiting to screw both of you? Don't rely on the styrofoam block to protect the kid. Make sure the sharp part is buried into the wood and the head of the screw is recessed at least a half inch into the block.
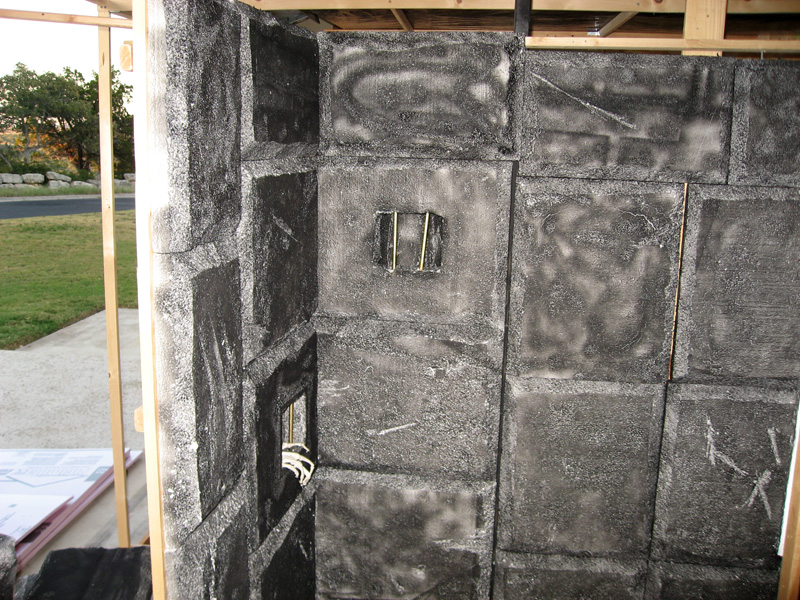
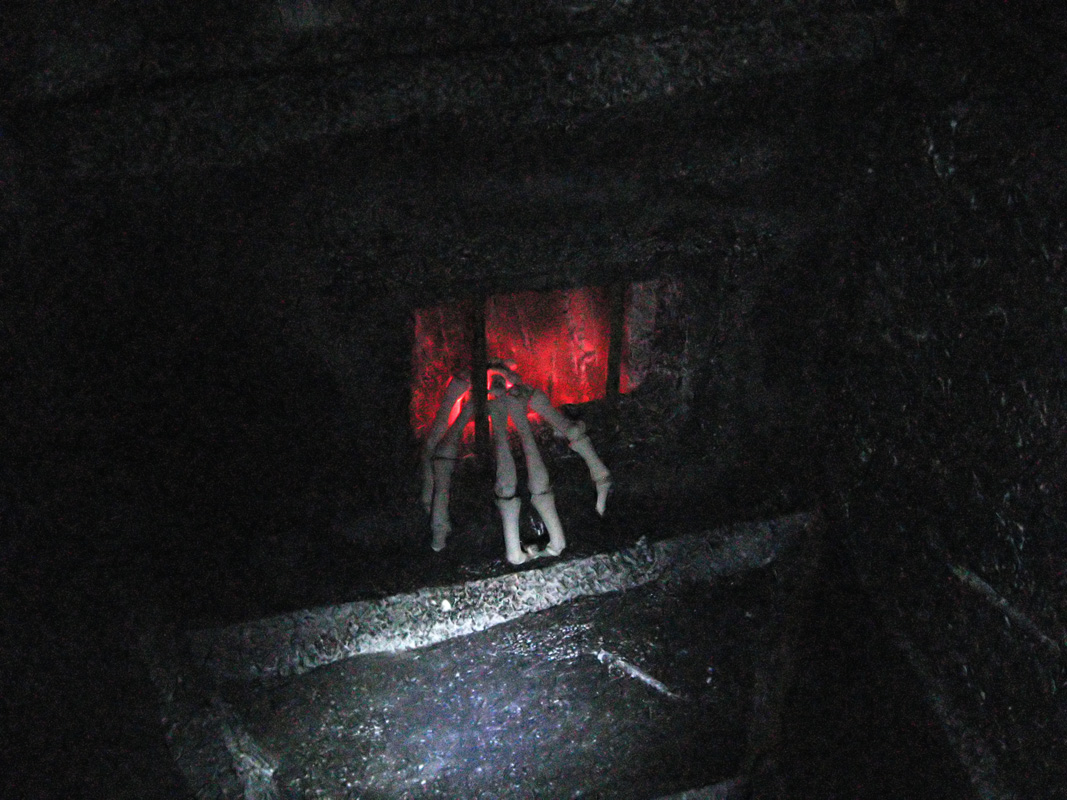
You will notice a few nooks I cut into the walls. I put some LED flicker candles and skeleton hands in to look like there were skeletons trapped behind the walls. They looked pretty good in the dark.
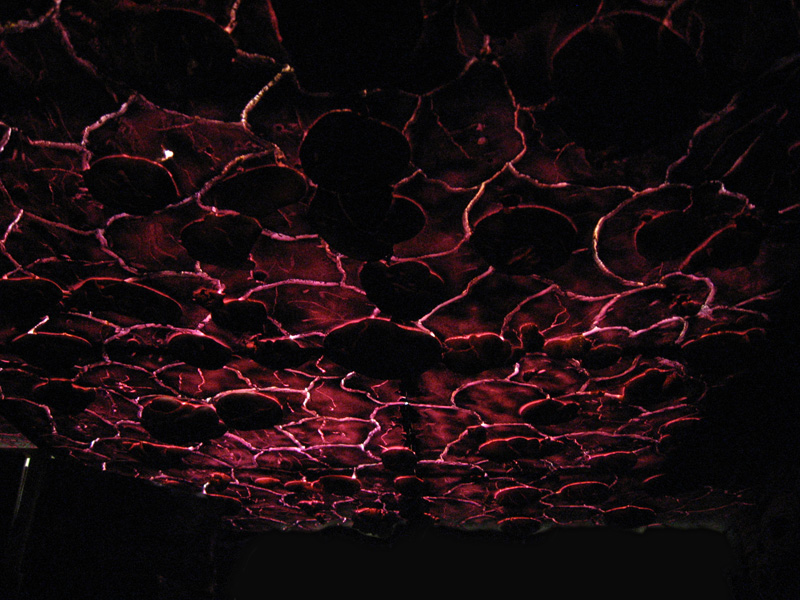
For the ceiling to my large hell chamber, I made a light wooden frame and carved up three 8' x 4' half-inch foam boards from Home Depot as described before. I then attached them to the frame, added a few more two-part foam rocks to cover the seams between the foam boards and painted it all up. The foam board I used was pink and you can see from the picture that I did not try to paint in the cracks. You will see why shortly.
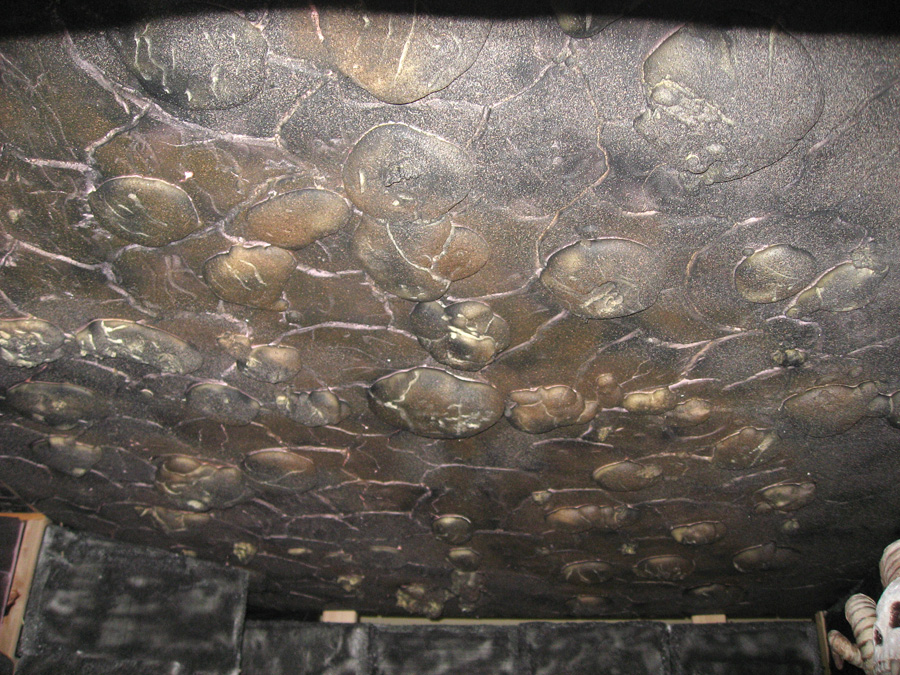
I then put some red flood lights shining on the topside of the ceiling outside of the room (I don't have a picture). The red light easily passed through the foam board cracks and made the whole roof glow like lava. If you want a better effect, you could try using motors, shadows and other effects on the light to make a dynamic effect like convection (I just used red light bulbs).